Moroccan bread
 Follow
Bread is big in Morocco. A meal is not complete without bread, and it is always fresh and always good. You wouldn’t catch anyone mopping up their tagine with white sliced ‘plastic’ bread. It has to be the real deal.
 Many of my memories from Morocco involve bread: women at home kneeling on the floor kneading dough in a gsar (wide earthenware dish); rounds of dough rising underneath warm
  sheepskins; children in the street ferrying loaves on planks of wood on their heads to and from the neighbourhood bakery; men baking thousands of loaves each day in huge wood-fired ovens, the smell wafting out onto the street; or women in mountain villages baking one at a time in tiny home-made mud ovens at home; people arriving home with their freshly baked loaves for dinner, each marked with the family’s own signature gashes; the delicious combination of fresh bread and olive oil, enjoyed on arrival in many homes; the mother of the household tearing the warm disks into rough wedges and plonking them in front of each diner, shouting “eat, eat!”
Bread is never wasted. If some is dropped, or found on the floor, it is immediately retrieved. In markets you will find tables of stale bread pieces for sale for a few pennies. It would certainly not be thrown away. It made me feel guilty, thinking of all those hardened loaf ends I’ve binned, or worse, those horrible supermarket specimens that go mouldy in their plastic bags while unnaturally still soft despite being a fortnight old. So I have resolved to make my own bread more often; when I don’t, to buy real bread, free from added enzymes, conditioners and anti-fungal sprays, and to keep stale bread for breadcrumbs.
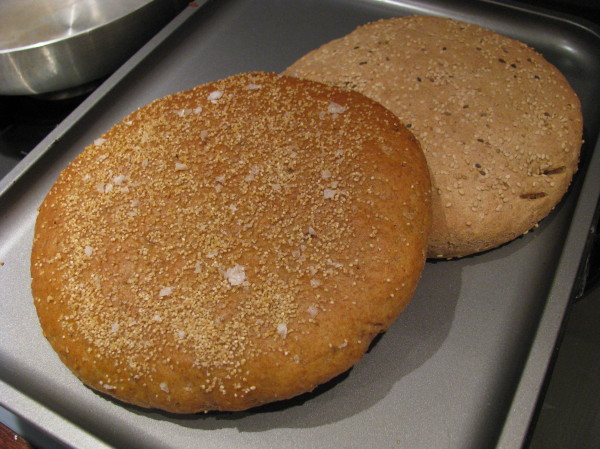 For this recipe I tried to recreate the texture and flavour I can remember from the basic ‘hobz’ you get everywhere in Morocco. Of course, each region and each family has its own style, and there are numerous kinds of bread in Morocco, with different names. This is a simple ‘everyday’ version that goes well with tagines. The aroma of the sesame and anise from the freshly baked bread seems unmistakably Moroccan.
Recipe:
Moroccan bread.pdf
Makes: 2 squat round loaves (enough to go with a tagine for 6 people)
Time needed: around 3 hours (of which only 30 mins busy)
250g white bread flour (‘strong flour’)
125g wholewheat flour
125g barley flour or maize flour (fine polenta works well)
2 tsps salt
1 tsp sugar
7g fast action dried yeast
325ml warm water
2 tsps sesame seeds
1 scant tsp anise seeds
extra sesame/anise seeds to decorate bread
olive oil for greasing bowl and brushing on bread
- Mix flours, salt, sugar and yeast in a large bowl. Add around ¾ of the water and mix to start forming a raggedy dough.
 Tip out onto a clean work surface and knead to bring the dough together. Keep kneading for around 10 minutes, periodically adding more water. I like to use the kneading technique I’ve seen many Moroccan women use: punch down all over the dough with your knuckles, twisting and rocking your knuckles and spreading out the dough until it’s less than an inch thick. Then sprinkle on some water, knuckle it in and roll up the dough. Repeat many times, until all the water has been used and absorbed, and the dough is homogenous and has a smooth, springy feel. It helps if you position yourself above the dough so you can use your whole upper body weight and strength. You should not need to dust the work surface with flour; it should remain quite clean. (Moroccan women do this kneeling on the floor with the dough in a wide, shallow, flat-bottomed earthenware dish called a gsar in front of them.) When dough is ready, sprinkle seeds over and knuckle them in. Knead a couple more times to distribute seeds. Form dough into a ball.
- Clean out the bowl and grease it lightly with olive oil. Place dough inside and turn over a few times to grease it too. Cover bowl with clingfilm and leave in a warm place until dough has doubled in size, around 1½ hours.
- Divide dough into two halves and gently form each into a smooth ball. Let rest 10 minutes while you line two baking sheets with baking paper.
- Place a ball of dough on each baking sheet. Using the palm of your hand, flatten each out into a disk around 7” wide. Sprinkle seeds over and gently press them in.
- Leave loaves to proof somewhere warm, covered with a damp tea towel, for an hour or until risen and puffy to the touch. Meanwhile heat oven to 240C.
- Gently brush loaves with olive oil and then make 3 or 4 small incisions around the sides with a small sharp knife. If you wish, sprinkle with coarse salt. Bake for 30 mins, or until loaves are nicely browned on top and sound hollow when tapped underneath. You may need to rotate the baking sheets so that the loaves brown evenly. Let cool on a rack.
- Serve the same day, or once totally cooled wrap in clingfilm and freeze. To use, defrost and then blast in a hot oven for five minutes; they will taste freshly baked.

Alternative method:
This results in a slightly airier, tastier bread, but takes more time. It is adapted from Alford and Duguid’s excellent ‘Flatbreads & Flavors’.
- Mix yeast with warm water, then stir in white flour until smooth. Stir 100 times in one direction, then cover with clingfilm and leave for around an hour or until well-risen and bubbly.
- Mix in remaining ingredients, then tip onto work surface and knead until smooth and springy, around 5-10 mins.
- Proceed as above, from step 3.
Comments are closed