Quince jelly
 Follow
Of course, you could use whole quinces for this, but it works just fine with skins and cores left over from other quince recipes, a tip I picked up from our jam-making friend Eduard Dumitrescu in Romania. (After all, that’s where all the pectin is.) In fact, our jam and jelly discussions with Eduard and his wife Anca lasted long into the night, as we traced the etymology of Romanian’s many words for ‘jam’…
 This is a standard jelly recipe, so you could use cooking or crab apples instead, or half apples and half hedgerow berries – rowans, rosehips, sloes, blackberries, elderberries and haws all work well. It helps to squish the simmering fruit with a potato masher once or twice, to ensure all the flavour comes out. You can also flavour such jellies with a little spice or herb, by adding these to the simmering fruit at the first stage.
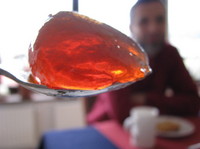
The secret to a good quince jelly, I think, is to simmer the fruit a long time so it reaches a beautiful pink colour. Like crab apples, quinces turn pink as they cook, but they take a lot longer to do so. Your jelly will be delicious with roast pork, lamb or duck, or just on toast or rice pudding.
Recipe: Quince jelly.pdf
quince cores and skins (as soon after they’ve been cut as possible)
lemon juice
white granulated sugar
- Chop quince cores into pieces if bulky and place in a large pan with skins. Add cold water until just covered and a large squeeze or two of fresh lemon juice. (Lemon pairs well with quince, and also helps release the pectin.) Cover and simmer until fruit is very soft and has turned a beautiful pink colour. This may take two or so hours. If the water reduces considerably, add more as needed.
- Pour into a jelly bag and leave juice to strain through into a bowl for several hours or overnight. Don’t rush it by squashing down the pulp. But you could lay a saucer on top and weight it with a tin can. You can tie muslin to the legs of an upturned stool to fashion your jelly bag, but to be honest it’s a real faff and I highly recommend just ordering a jelly bag and stand from the likes of Lakeland. It will work perfectly, again and again.
- Prepare as you would for any jam-making session. That is to say, put a couple of saucers in the freezer, then scrub several jars in hot soapy water, rinse well, put them on a tray in the oven and set temperature to around 125C (260F). Make sure you have enough new lids that fit.
- Measure juice. If it looks dark and strong you could add a touch more water to make it up to an easy even number. Heat in a large pan to simmering point then tip in 450g sugar for every 600ml of juice. Keep the heat low and stir gently until dissolved.
 Now raise heat and boil to setting point. Resist the temptation to stir, but check it does not boil over. To test for setting point, spoon a little onto a chilled saucer, wait a minute, then push with your fingertip. If it wrinkles, it’s ready. Check frequently. If there is scum on top, skim it off. Ditto any skin that forms in the time between turning off the heat and getting the jars out. But you may not need to do either.
- Carefully pour hot syrup into hot jars until just a couple of mm from the brim. Screw lids on immediately, then turn upside down for a few minutes to sterilise the lids. Let cool the right way up undisturbed overnight. You should have a perfectly clear, ruby jelly.

Comments are closed